Thursday, October 13, 2011

MDS Blog Hop - Give Thanks Digital Page

It's that time of the week again - FRIDAY! Time for the MDS Blog Hop!

This week our theme was Thanksgiving or giving thanks. And what am I most thankful for? Two little girls who call me Mom. Not to mention nothing gets my scrappin' mojo flowing faster than working on a page about these two little cuties.

I created this page as an 8x8 page, thinking of doing some 8x8 albums for the grandparents for Christmas this year (ssshhhhh!) The cool thing about the 8x8 size is that all of your stamps and elements are bigger! I love using BIG elements on my pages, so this size was perfect.

All digital products used are listed below, but if you don't see it listed that's because it was included in the full version of the My Digital Studio software.

PS - I went a little crazy buying fun elements for this page and re-purchased a few of them (oops!) so this week I'm going to be giving my extras away on the blog. Check back for the info!


Continue to hop! See more My Digital Studio thankful ideas from the following blogs.

Wednesday, October 12, 2011

October 12 - Pumpkin Jar Lights


No doubt you've seen this idea on blogs (I found it on my cousin's blog CynSew), not to mention on a magazine cover the other day. It's a super-cute idea that I figured I could do as a craft project with my girls (ages 6 & 8) with minimal mess. Just a little tissue paper, jars and some Mod Podge and we were good to go. We let the tissue paper dry overnight, but then the next morning it was time to make the faces.

The girls started to draw them on a sheet of Basic Black cardstock, but found it hard to do. I knew I had the answer - we brought down a basket of Stampin' Up! punches and started punching out faces! The smaller circles overlapped made for fantastic eyes (Natalie made her ghost jar a little crazy!) and the pennant punch was awesome for the triangle eyes and noses. But the punch we found ourselves using most was the wide oval punch. We cut teeth out of it, used the whole shape to make our ghost "yell" and cut a smile out of another wide oval. The modern label punch trimmed in half made a great nose, and paired with tips from the pennant die made a great mouth with fangs on our green jar.

The girls were so proud of what they'd made and the punches made it so much easier!


Thursday, October 6, 2011

MDS Blog Hop: Halloween Party


Last week I was invited to join a very talented group of Stampin' Up! ladies to participate in a weekly My Digital Studio Blog Hop. I'm SO excited! Each week you'll get to follow the blogs to see fun ideas in a different theme every Friday.

This week is Halloween Party week! Our challenge was to make Halloween party goodies using My Digital Studio. Since I'm a digital girl that can't let go of her paper, I wanted to do a hybrid project. I love the new Kraft Gift Boxes that are in the new Holiday Mini Catalog, and figured they would make great Halloween treat boxes.

I printed the background paper from the digital "Wicked Fun" kit onto Whisper White cardstock and cut it to fit the sides of the box (2-1/2" x 3-1/2"). Then inked the edges and over the surface with black ink. Then I created the "Audrey" name tag in My Digital Studio with the cute little owl (Audrey LOVES owls!) and printed it also on Whisper White cardstock. Punched it out and adhered it to a 2 1/2" circle. I then adhered it to a sucker stick with the inside circles from the new shaker frame adhesives from the Holiday Mini.

The last step is to punch holes in the top and side flap of your box with the Crop-a-dile (the largest hole fits the sucker stick PERFECTLY). I figured out a trick with it too - punch your hole in the top flap first, then assemble the top of your box. Then stick a pen or marker through that hole to mark where you will need to punch the side flap so it lines up correctly. Easy! The bat is from the bat punch that is currently on the Clearance Rack - get it while it's still available!

Supplies Used:


Now go see more My Digital Studio Halloween party ideas from the following blogs in the hop!

Monday, October 3, 2011

October 3 - Tie Dye Embossed Flower

When these paper flowers came out, I didn't buy them. I had no idea what I would do with them. They're white! Classy, but slightly boring.

Well, I bought them. And I love them. And I wonder how I ever lived without them. And I hope they never, ever, ever retire. Ever. :) These paper daisies are like a blank canvas for color, and I love me some color!

The only thing is - they're paper. So when you ink them, the color ends up looking inked, not dyed. So I made a video of a quick way to dye them without having to use Stampin' Up!'s re-inkers. Oh yeah, and I might have heat-embossed them too. I have to give credit to my very eager 8-year-old daughter who did such a fantastic job filming this video for me. (You can hear her excitement at the end!) Makes me laugh. :)

Saturday, October 1, 2011

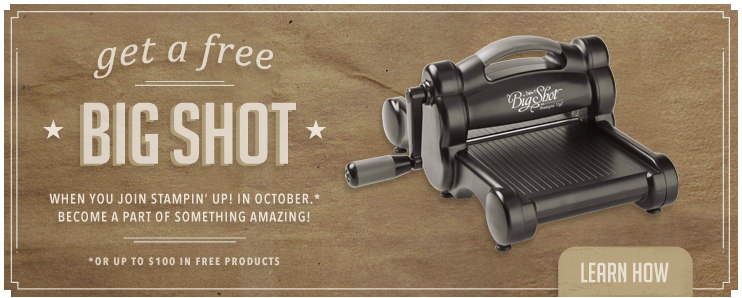
Get a FREE Bigshot!


I can't even begin to tell you how much I wish I could join as a new Stampin' Up! Demonstrator right now! A new October special for new Demonstrators has been announced and it's AMAZING! Here are the details...

An offer to DIE for!

If you've been looking for an opportunity to do what you love, while getting a 20 discount on your favorite products, now is the perfect time! During October, you'll get a FREE Big Shot when you join the Stampin' Up! family as a demonstrator.*

Use the Big Shot die-cutting machine and Stampin' Up!'s exclusive dies** to create uniquely beautiful projects in a flash.

In addition, the new-demonstrator Starter Kit--a steal at just $175--contains over $345 worth of stamp sets, card stock, ink, accessories, and business supplies-everything you need to start your new business.

There are so many benefits of being a Stampin' Up! demonstrator, including

  • A 20 percent product discount!
  • A free monthly issue of Stampin' Up!'s demonstrator-only magazine, Stampin' Success!
  • Sneak peeks at brand-new products!
  • Invitations to exclusive Stampin' Up! events!
  • Regular get-togethers to stamp!
  • Monthly demonstrator dinner meeting and card swap for local demonstrators in the Mansfield, OH area.
  • Free access to an online community of 30,000+ crafters/stampers and creative artists, as well as 160,000+ project samples!
  • Plus, access to an exclusive video and training for your new Big Shot!

Don't miss this BIG deal!

If you'd like to take advantage of this offer you can call me, email me at holly@hollystamps.com or sign up by visiting HollyStamps.com and clicking the "Join Now" link on the left side of the page. When signing up if it asks for a demo password, it is "hollyvandyne" without the quotes.

We'd love to have you as a member of the "Funky Stampers" team!

Monday, September 5, 2011

September 4 - Digital Scrapbooking Template

Made this page yesterday and forgot to post. I moved my on-the-couch pity party to the dining room to build Harry Potter Legos with the girls and got a little carried away. A good carried away though!

This page took me LITERALLY two minutes to make. Buying the Vintage Overlays digital pack for Stampin' Up!'s My Digital Studio uploads this sweet little page template into your program.

Just open up the template, pop in your picture, replace their journaling text with yours and save. DONE.

Here is the link to the overlays pack that gives you the template:
Hope you're having a great Labor Day - I'm going back to building Hogwarts! :)

Saturday, September 3, 2011

September 3 - Changing a Design

Sometimes I don't feel like starting from scratch to make something. Sometimes it feels like so much pressure just staring at a blank sheet of cardstock, trying to figure out what to do with it.

You don't need to worry about that with My Digital Studio. One of the cool things about it is that they have templates set up. Some for cards in just about any size or shape you can think of, and also for scrapbooking where you can just pop your pictures in and be done. But the thing I like about the templates is that you can change them! Anything you don't like about it - start a new project, open it up and start moving, deleting and adding things! I did it with this card template (which is perfectly fine, by the way) but I wanted to make a card to send to my mom.

Once I get it printed, I'll add a rhinestone or pearl to the center of the flower before I send it off. Mom loves her three girls so I'm sure she'll love getting them on a card.

To see all of the digital items available for Stampin' Up!'s My Digital Studio you can visit my online store.

September 3 - Nat Digital Page


What a holiday weekend! My neuromuscular disease decided to act up on me and confine me to the couch for the weekend. But no crying in this house - I'm excited! I decided to make it a "My Digital Studio Weekend"!

I haven't been doing a lot of digital projects lately so I updated my MDS software, purchased some new digital goodies and I'm good to go!

And have I told you? Stampin' Up! has just announced a new MDS Designer contest. The prize? $400 worth of MDS Digital goodies! And the best part - its open to both demonstrators AND customers! Just enter one scrapbook page and one card - how easy is that? For more details on the contest click here.

To get my digital juices flowing again I started with a blank slate and did this page this morning. Those of you who know how long it takes me to make a paper layout shouldn't be surprised to know it takes me just as long to do a digital page! Oh, it was SO fun and I could do it from my weekend spot on the couch (and no paper/supply mess for hubby to fret about!)

Want to know what my favorite secret about digital is? You only have to buy something ONCE. No matter how much "paper" or "ribbon" or "rhinestones" you use in MDS, you will NEVER RUN OUT! And guess what? Your ink will never run dry either! Had this been a paper layout I would have never used as many rhinestones as I did on the butterflies, I would have used the whole pack! But not in MDS - I have enough to last me for life! :)

Here is a list of the digital products I used for the layout above (with links to the store if you see anything you can't live without):
NOTE: If the item is not listed, it is included in the full edition of the software

Monday, August 29, 2011

August 29 - You're the BEST

That first school bell of the year has rung which means Holly goes back to work! It's a good thing I love my job so much, otherwise three months off might be too hard to recover from.

As what happens to most of my cards, this was just a me-playing-around card. I wanted to experiment with making some flowers and it was fun! If I can figure out how to do it, I'll be posting a video in the next few days on how to make some like the blue one. That one flower is all one layer and was really fun to make.

But now its back to school for me - I think I can hear the bell already!

Don't forget - only a few more days to order the Clear Cards Kit. (Information is in the previous post!) Don't miss out!