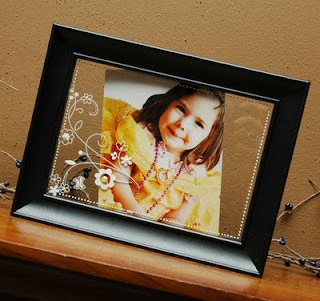
I did this first one as an experiment - the project is VERY easy to re-create! And I love how it turned out!
And just on a quick side-note before I get to the instructions, I started another Etsy store and blog - this one for the name frames that I've been having so much fun making. I'll have ideas on the blog frequently for different ways to use the frames. The frames make a great wedding, shower or housewarming gift and if you already have your own frame I have the store set up so you can just buy the letter prints to add to your own frame if you would like.
OK - back to the project! :)
Floating Frame
Ingredients:
- 5"x7" Frame, preferably with flat sides so it will stand on its own.
- White Rubons (Stampin' Up!)
- White Signo Pen (Stampin' Up!)
- Pearls (Kaiser Craft)
- Thin Super Tape
1- Take the back completely out of the frame and set the glass aside - you'll add it back in a bit.
2- Take your Super Tape and line the inside lip around the whole frame (where the glass overlapped)
3- Peel off the tape backing and place your glass into the frame, pressing down on where you added the tape to adhere it well.
4- Using your Signo pen, create your dots around the glass - close to the frame itself to create a little dotted border.
5- Apply your rubons then add your pearls on top of the rubons.
6- Tuck your 4"x6" photo under the top and bottom (and maybe side?) lips of the frame to hold it in place. You can use a little more of the clear super tape on the top and bottom where you tuck the photo to hold it into place more if you would like.


2 comments:
What a great idea, thanks for sharing it with us.
This is an amazingly simple idea, but so unique at the same time!! Where do you come up with these ideas Holly??
Post a Comment