Tuesday, April 29, 2008

April 24 - Hanging Clear Star

I've never been a jewelry type of girl. My mom and aunt have always collected tons of it, and I think they have enough for me included. HOWEVER - I am certainly not opposed to using it on my pages or on home decor projects! So when they have a garage sale, I clean house on awesome jewelry for a quarter! Pins especially, they are so easy to use on stuff because you can either just take the back off or poke it through something to hold it in place like I did with the dragonfly pink I used on this star.

Hanging Clear Star

Ingredients:
  • 8" Clear Star (Pageframe Designs)
  • Dragonfly Pin (or any other pin you may have)
  • White Stazon ink (Tsukineko)
  • "Flowers for a Friend" stamp set (Stampin' up!)
  • Gold elastic cord (Stampin' Up!)
  • Gold eyelets and Crop-A-Dile (Stampin' Up!)
  • White cheeky board clips (Making Memories)
Instructions:

1- Using the white Stazon stamp your image around the edges and points of the star. Allow to dry.
2- Punch your holes on the top of your two side points for your cording to hang from. Add your eyelets. You may need to do another one at the top like I did if you pin is heavy enough to cause your star to keep falling to one side. This middle one will help keep it balanced. But test it first without the middle one to see if it will work with your pin.
3- Punch two holes for the sides of the pin to go through. This will allow the pin to attach together normally through the back of your star and hold it in place.
4- Tie your cording in place and hang it from what you plan to hang it from to see if it falls to one side. If so, just punch another hole and add another eyelet and more cord to the middle star point.
5- Clip your photo to the right side of the star.
6- Stamp or write your caption and clip that to the side as well.

April 23 - Scalloped Embellishments

More fun little embellishments! I'm getting back to the home decor thing this afternoon so no worries. ha ha
I just like making cute little embellishment sets every once in a while.

Scalloped Embellishments

Ingredients:
  • Colored Cardstock
  • Bling Centers (Heidi Swapp)
  • Scalloped Punch (Stampin' up!)
  • Scalloped Rubons (Stampin' Up!)
  • Kraft Wordfetti (Making Memories)
Instructions:

1- Apply your rubon to the cardstock, then punch it out with your scallop punch.
2- Adhere your bling circle to the center of the rubon.
3- Take your wordfetti stickers and adhere them to the top of the bling circles.

April 22 - Mini Greeting Tabs

Gotta...get...caught...up...
:)

I've been creating like a mad fiend, trying to get enough stuff created to populate a craft show booth for a show I signed up for in mid-June. So I've been creating a ton and not posting a ton (so sorry!) so I'm working to get caught up today! In between cleaning, laundry, nose-wiping (Natalies, not mine), and getting ready for calling hours tonight for Chad's uncle.

Oh, how I love the tag punch. This is a great project to use those scraps you love but just can't make yourself throw away because you love the paper too much.

Mini Greeting Tabs


Ingredients:
  • 6 different scraps of patterned paper (your choice!)
  • Large Tag Punch (SU!)
  • "Short & Sweet" stamp set (SU!)
  • Chocolate Chip ink (SU!)
  • Felt flowers (SU!)
  • Mini Brads (SU!)
  • Eyelets and Crop-A-Dile (SU!)
  • Gold elastic cord (SU!)
Instructions:

1- Punch out your shapes.
2- Stamp your greetings on them at an angle and so the trailing lines on the ends of the words go off the tag.
3- With your Crop-a-dile punch holes in the tops of each tag. Attach your eyelets using the same tool.
4- Attach your small felt flowers with the mini brads.
5- "fold" the cording in half, then put the looped end in through the FRONT of the eyelet on the tag. Pull the ends back through the loop you just put through and pull.

Saturday, April 26, 2008

April 21 - The Real Thing Page

I've been designing and making these kraft journaling spots to put on Etsy and to put in a basket at the craft shows I'm doing, so I wanted to make a page using one to show the size of them and how to use them. I'm going to try my hardest to get caught up with projects on the blog this weekend! :)

"The Real Thing" Page

Ingredients:
  • "Big Deal Alphabet" Stamp Set (Stampin' Up!)
  • Scalloped Paper (Creative Imaginations)
  • Striped Patterned Paper (Fancy Pants)
  • Paper Ribbon (Target - K & Co.)
  • Sage Shadow and Chocolate Chip ink (Stampin' Up!)
  • .08 Micron black pen (Sakura)
  • Journaling Spot (My Etsy Store)
Instructions:

1- Place your 4"x6" photo at the top left at an angle. Adhere your patterned strip of paper under your photo at the same angle.

2- Place your paper ribbon across the patterned paper.

3 - Stamp your title in the area in the top right with alternating colors.

4- Sew over and under your paper ribbon with a zig zag stitch. Then with a straight stitch, sew around the edges once.

5 - Add your journaling spot at the bottom right, then journal at the bottom directly on the paper.

Wednesday, April 23, 2008

April 20 - Altered Childrens Book

Back in 2006 when I was a finalist for the CK Scrapbooker of the Year contest - as part of the hoops we had to jump through for the big prize we had to create a class proposal for a Creating Keepsakes University online class. First they said my class proposal was going to be used (yay!) but then they did away with the online classes (ugh!). So I was left with the class which I've just hung onto for almost two years now. So - time to share it!

I won't post the text here because I made it into a PDF document with much more info that will fit on here so if you'd like to download it, just click the link below. It's in a .zip file to make it smaller, so just download that then extract the PDF to view it or print it out.

ThermOWeb makes these GREAT laminating sheets that I put over my photos/journaling so that as often as my girls look at the book then can't smudge it (and crayons wipe off!). They love this book and want me to read it to them at bedtime all the time, so the laminating sheets really do help with the wear and tear. And for the journaling you can use yesterdays digital downloads, just download and print them on colored cardstock that will match the book you are altering!

Click here to download class PDF!

April 19 - Journaling Download

Time for another digital download! :)
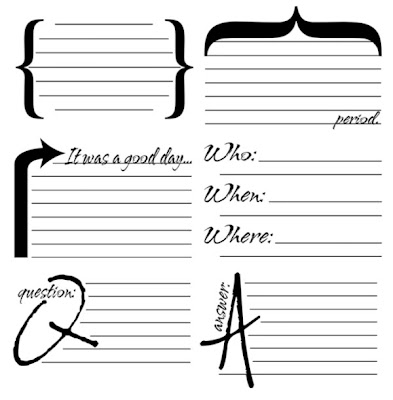
These are journaling spots and there are a few different ways you can use them. When you download the .zip file and extract the contents you will have two different types of files. The first file is a .abr file. This is one brush set file with each journaling image as its own brush. Just copy the .abr file into your Photoshop brushes folder.

The other files included in the .zip file are .png files. These open up as regular image files without a background. Which means you can use them a few ways - you can just open the one you want then print on any patterned paper and cardstock that you put into your printer OR you can just include them in any digital layout you may be working on.

If you have any questions on how to use them just post a comment and I'll be happy to help you out!

Click here to download!

April 18 - Damask Tree

I'm almost a week behind on blog posts (so sorry!) but not for lack of work or ideas - just been working on a larger project that I can't post yet. I should be able to post it in a week or so though. So now I'm going to play blog catch-up, so expect quite a few posts in the next few days. I'm signed up for a quite a few craft shows this summer, fall and winter so I'm trying to create some things to stock up my inventory for that and my Etsy store. Quite honestly I hope it doesn't sell because I love how it turned out! :) The star is a big rhinestone pin that I got at my Aunt's garage sale last year and I thought it would be perfect for the top of the tree! Because the tree is hollow and made from paper mache it poked through it perfectly.

Damask Tree

Ingredients:
  • Paper Mache Tree
  • Rhinestone Star Pin
  • Black Paint (Making Memories)
  • Damask Patterned Paper (Teresa Collins)
  • Paper Flowers (Prima)
  • Swarovski crystals
  • Zots (Therm O Web)
  • Modge Podge
Instructions:

1- Paint the tree with a foam brush and black paint. Allow to dry.

2- Cut your patterned paper into large strips and turn over and with a foam brush spread the modge podge on the back and quickly (before the glue dries) place it on the tree and hold it there until it dries.

3- Poke pin through the top and clasp to hold in place.

4- Using the Zots adhere your flowers and crystals.

Monday, April 21, 2008

April 17 - Audrey Page

I went back and printed out a few of my favorite photos from a few years ago - I can't believe Audrey is so grown up already. Where does the time go? All supplies used were Stampin' Up!

Audrey Page

Ingredients:
  • Bali Breeze Designer Series Paper
  • Scalloped Circle Punch
  • White Signo Pen
  • "Schoolbook Serif" Alphabet Stamps
  • "A Beautiful Thing" Stamp Set
  • "Spunky Spots" Jumbo Wheel
  • "Lucky Star" Accents & Elements Tin
  • White Craft Ink
  • Soft Sky and Chocolate Chip ink and cardstock
  • "Eastern Elegance" Rubons
  • Sewing machine and brown thread
Instructions:

1- Take a strip of the soft sky cardstock cut to 8 1/2 by about 3". Roll your Spunky Spots jumbo wheel on it first with the white craft ink, then again over that with the soft sky ink. Stamp your title or name with chocolate chip ink then adhere it under your photo on the page.

2- Rubon your border to the right side of the photo.

3- With a zig zag stitch sew the bottom strip at the bottom and the top onto the page. Write on your self-adhesive journaling tab and add it to the page.

4- Add your flower strip at the top of the photo.

5- Stamp 4 flowers from the "A Beautiful Thing" set on Soft Sky cardstock with Chocolate chip ink and cut out the flowers. Punch 4 scalloped circles with the chocolate chip cardstock and add dots around the edges with your white signo pen.

6 - Adhere your flowers on top, then put them on the page scattered on the left side. On the middle one use your large circle sticker from your Lucky Star set and put a flower you just made inside.

Sunday, April 20, 2008

April 16 - Clear Tag Flip Card

My dear friend Suzy's birthday is this coming Sunday. She's my crop buddy - once she even altered a mini deodorant for me (inside joke!). So I wanted to come up with something different for her card.

It's kind of hard to tell from the photo but the little pink tag is actually 4 little pink tags with various stamps and messages on each so she could flip through them. I think it's kind of funny - I never thought I would want this Stampin' Up! tag punch and I bought it on a whim. WOW am I glad I did! It's now my favorite punch! :)

Clear Tag Flip Card

Ingredients:
Instructions:

1- Peel the protective sheet off of the non-printed side of the tag. Add your scalloped rubon on the bottom center of the front of the tag, then add your bling circle in the center.

2- Rubon your border above the scalloped circle.

3- Punch 4 tag shapes from the patterned paper, punch a circle in the top of each and add an eyelet in those circles.

4- Stamp each tag and add your greetings.

5- Hang all 5 tags from a binder ring.

Friday, April 18, 2008

April 15 - Big Give Page

One of my fellow Couture Scrapbooking design team members, the very sweet and talented Debbie Fitzgerald has a challenge blog called Dreamgirls. And I love a good challenge!


I've put off creating this page for over a year. I didn't want to tell anyone what I had done, but then I got to thinking about it after I read the challenge (use a reality show title, stamping and felt on your page) I knew this was what I needed to do the page on. I wanted my girls to know that it is always good to "Give BIG or go home." :) And hopefully this will be an example for them.

The Big Give Page

Ingredients:
Instructions:

1- Print out photo and adhere it to the page. Stamp your seal with the Stazon in the corner and put a flower and pearl in the center.

2- Stamp your scalloped border stamp on both sides of where your flower stem will be. Adhere your stem in the center with Super Tape. Then adhere your flower at the top of the stem with a Zot and put your large rhinestone in the center.

3- Stamp your title around the photo.

4- Cut out your black journaling strips. Write your journaling down the page, adding the journaling strips where and when you have room so the journaling you write goes around them.

April 14 - Digital 101 Page

I love doing digital pages, just don't often get a chance to do them since I've been trying to limit my computer time lately. Well, that and the fact that I'm so hopelessly addicted to paper...and stamps...and embellishments...you know how it goes. :)

But I am very excited that I will be teaching a "Digital 101" class over at Couture Scrapbooking. If you've always wanted to try digital scrapbooking (or even just hybrid scrapbooking which is a mix of both paper and digital scrapbooking) then this class is the perfect start.

I've come up with a digital kit of goodies (paper, embellishments, etc.) that we'll be using to make this page and a few others. And you'll receive a PDF with step by step instructions for putting it all together. And last but not least, access to a class-only forum where you can chat with me and the other students to talk about the class, the projects, ask questions, etc.

I'm so excited, I really do think it is going to be a lot of fun! To the right is one of the pages that we'll be making in the class using a bunch of Photoshop techniques (you'll download a FREE 30-day trial of the software for this class if you don't have the program installed on your computer already). Hope to see you in class! If you want more details on how to register just click here.

Wednesday, April 16, 2008

April 13 - Star Chipboard Frame

I sat down to make a new creation for my Etsy store and somehow ended up with this. I do love how it turned out. :) It's so hard for me to believe that my sweet little baby Nat will be 3 next month! I hardly remember her being this small.

Star Chipboard Frame

Ingredients:
Instructions:

1- Using a foam brush cover the front of the chipboard with Modge Podge. Place the back of the patterned paper on top and press down, then let dry.

2- After it dries turn the chipboard over on its front and take a razor blade and run it around the edges to cut off the remainder of the paper.

3- Peel the protective sheet off both sides of the star. Using your white Signo pen dot around the edges of the star.

4- Hold the star over where you want it to lay on the frame and punch through both the acrylic shape and the chipboard with the smaller end of your Crop-A-Dile on the two star points that are over the chipboard. Don't worry - it cuts through it all like butter!

5- Stamp your stamp on the bottom center then add your Zots to the sides of your bookplate and put it around your stamped image. Add your small pearls to the sides over the brad holes.

6- Cut your lace cardstock out to fit over the chipboard, overlapping the edges slightly. Put your photo on top, then put your star over that. Then add your large brads through the holes you punched with the Crop A Dile.

Monday, April 14, 2008

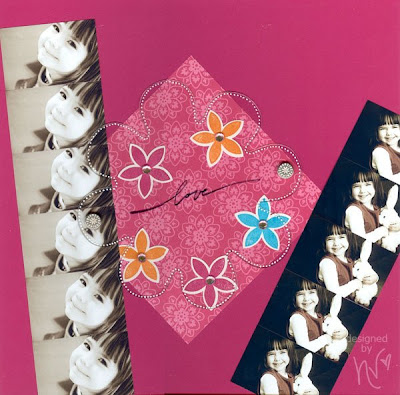
April 12 - Love Layout

Well my obsession for using little photos is still going strong. :) This is a page I did for my Stampin' Up! Scrapbook Club group. It's a simple page, but fun to make. All items are Stampin' Up! unless otherwise noted.

I use Photoshop Lightroom to print my photos at the smaller size - instructions for doing that with the Lightroom program are included in the instructions below.

Love Page

Ingredients:
  • Purely Pomegranate Cardstock
  • Purely Pomegranate, Pumpkin Pie and Tempting Turquoise ink
  • Black Stazon ink
  • White Signo pen
  • Bali Breeze Designer Series paper
  • Large brads from new Hodgepodge Hardware in Occasions Mini
  • "Wonderful Words" Stamp Set
  • "Ginormous Flowers" Stamp Set
  • 5-Petal Flower Punch
  • Pink Rhinestones (Hobby Lobby)
  • Clear Flower Shape (Pageframe Designs)
  • Crop-A-Dile
  • Zots (Therm O Web)
Instructions:

1- Adhere your 6”x6” patterned paper in the center of your page in a diamond shape.

2- Adhere your punched out flowers on top of the paper.

3- Using your white signo pen dot around the top edges of the clear flower to define the shape.

4- Punch two big holes on two diagonal side petals.

5- Place your big clear flower over top of the diamond shape and poke holes in the paper through the holes in the sides of the flower for your brads. Don’t put the brads in yet.

6- Print your photos out using Adobe Lightroom (click this link to get a download a free 30-day trial). Just find the photo you want and click PRINT on the top right of the program. On the bottom left list choose “2x2 Cells”, the on the top right list check “Repeat One Photo per Page”. If the photos don’t fill the cells in the preview it shows you may need to click the “Page Setup” button at the bottom and change the orientation to Landscape.

7-Cut these photos out and line them up and adhere them on your page. Some can go under your clear flower.

8-Once you get your photos on just adhere your flower with the brads, and add your rhinestones on top of the clear flower in the middle of your punched flowers.

Sunday, April 13, 2008

April 11 - Clear Tag Wedding Card

Yep, it's another clear card! Just not a conventional one. Then again, when have I ever been conventional? :) This is a large polka dot patterned clear tag that I made into a card. It fits into a normal sized card envelope and makes a very unique greeting!

Clear Tag Wedding Card

Ingredients:
Instructions:

1- Stamp your circle stamp on the patterned paper.

2- Punch TWO scalloped circles out of the same side of the patterned paper, one around your stamped image. Adhere them back to back on the bottom of the tag.

3- Adhere your rhinestones to the front of the card on the full dots that are not covered by your scalloped shape.

4- Using thin Super Tape adhere your ric rac to both sides of the card.

5- Add your ribbon to the top hole and write your greeting and signature on the back blank scalloped circle.

April 10 - Clear Easter Photo Card

I was going through the Easter photos I had taken a few weeks ago and came across this one that I loved. Natalie was in focus, but the egg wasn't so I turned the rest of the photo to sephia and left the color in the egg. So I printed it out in a 3" x 4" size and used it for an Easter card.

I will also be having a small class in my home where we will be making 4 clear cards using the BRAND NEW patterned cards AND a clear scalloped mini album from Pageframe Designs. For more information and to sign up please just click here.

Clear Easter Photo Card

Ingredients:
Instructions:

1- Adhere your photo to the side of your patterned paper with the tape runner then adhere your felt frame on top with the tape runner.

2- With your sewing machine set to the zig zag stitch, stitch around the frame to adhere your paper/ photo to it. Then sew the center between your photo and the patterned paper.

3- Stamp your "U" and your "R" on the patterned paper inside of the frame.

4- Cut a sheet of patterned paper to fit the inside of the card but cut the top third of the sheet off. This will make the top of the card on both sides entirely clear. Lay your frame down on it like where it will be placed on the front of the card and stamp your letters under the frame.

4- Adhere your inside patterned paper you just stamped to the inside of the card, then adhere the frame to the front center of the clear card with your vellum tape runner.

5- Using your white signo pen make white dots around the edges of the front of the card that are not already covered by the frame.

Thursday, April 10, 2008

April 9 - Packaging

Yep, I'm a HUGE dork sometimes. Especially when I get a box of Stampin' Up! orders. I LOVE cutting rubber. So I cut all of the sets that leave my house before they get delivered. There is nothing better for me than sitting in front of the television at night and cutting down the stamps so I can mount them. Audrey loves it too and always tries to help, cracks me up.

I also love packaging the orders up. Sometimes I just don't have the time to do it, but when I do I love finding creative and fun ways to package up my orders. All Stampin' Up! supplies on this one.

Packaging

Ingredients:
  • 8 1/2 x 11 logo cello bag
  • "Wonderful Words" Stamp Set
  • "Schoolbook Serif" Alphabet Stamp Set
  • "Priceless" Stamp Set
  • Double stitched ribbon
  • Felt flowers
  • Metal rimmed tags
  • Staples
  • Brads
  • 6" x 6" Designer series paper
  • Ink (Purely Pomegranate)
Instructions:

1- For the card just fold the 6"x6" sheet of paper in half. This makes a 6"x3" card that will fit in any business sized envelope. Stamp your greeting on the front, then adhere your two felt flowers with brads in the center of them.

2- Put the contents in the cello bag with the card in front and fold the top half twice towards the back.

3- Cut a strip of ribbon the width of the bag and staple it to the top of the front.

4- Stamp your tag with the initial for the intended (take the ring off to do this) Then put the ring back on.

5- Punch a small hole in the side of the bag.

Tuesday, April 8, 2008

April 8 - Wonder Woman Page

Blogger has this new cool feature that allows you to set up your posts ahead of time and have them publish when you schedule them to publish - so I'm trying it out with Tuesday's post. If it works I will keep doing them ahead of time so every day each post will post at 8:00 am sharp. No more waiting for me to have time to post!

So because I'm so happy about this new feature I thought I would post a humorous page today (or tomorrow!). This one was picked up by CK who had it for over a year and never used it. So they finally just sent it back to me - I'm embarrassed to say I had forgotten all about it.

I can't remember who made most of the items so I'm not going to post a supply list or instructions (it's pretty easy to figure out). But have a good laugh at my attempt to dress myself on picture day!

Monday, April 7, 2008

April 7 - SO Photo Card

I have a hard time designing cards if there isn't a photo involved. Maybe it is that I'm so comfortable using photos on everything that I don't know how to handle NOT using one.

Well, my solution is easy. Just use photos on my cards! This one went together so easy. Not sure if you can tell on the photo but Natalie had taken a black marker and drew up and down her arm multiple times before I caught her and took her photo in the act. As you can tell she thought it was quite humorous, so why not make a humorous card out of it? The photo came out kind of fuzzy because I didn't have a whole lot of light in the room when I took it so I just printed the photo at a smaller size and it doesn't look quite as fuzzy.

SO Photo Card

Ingredients:
Instructions:

1- Print your text on the kraft cardstock then trim your card.

2- Tear your patterned paper and adhere it to the top front of your card. Trim if needed.

3- Add your felt letters to your die cut, adhere your photo then the die cut.

April 6 - Hanging Mini Stars

I did these a little while ago, but they were incredibly fun and fast to make and now they are hanging in my kitchen.

Hanging Mini Stars

Ingredients:
Instructions:

1- Print out your photos, align the stars on top of the photos until you get them the way you want them and trim them to the star shape. Use the vellum runner to add a little adhesive under the stars but adding a clip to each star will mostly hold them in place.

2- Outline your stars with the white sharpie.

3- Use the Crop-A-Dile to punch holes and add eyelets to the left and right side of ALL of the stars.

4- Embellish the stars with your flowers and rhinestones and any other embellishments you want to use.

5- Link them together with the mini binder clips. Tie the end ones with ribbon and hang them up from the two ends.

April 5 - Fridge Calendar

I hate when I have a vision of a project and by the time I am done it looks NOTHING like I had intended it to look. This would be one of those projects. And the sad thing - I did this project TWICE. I had JUST finished adhering all of the magnets and the clips and put it up on the fridge to see how it looked - well lo and behold, here comes Chad to get something off of the top of the fridge and KNOCKS IT OFF and broke it to pieces. I'm not kidding, this was like 5 minutes after I had hung it up there. UGH!

So I found all the pieces, got another frame out and went to work again. But it uses a LOT of magnets and a LOT of clips and a LOT of Zots!

The cool thing about this project is that you can take the clips off and move them around each month to match the days without having to completely re-do the calendar every month since they are on magnets. And if you want to put an event in just unclip the number and clip a post it note, or whatever you want to it to remind you.

Fridge Calendar

Ingredients:
Instructions:

1- Stick your calendar paper into the frame and back it with the cardboard pieces. Add magnet stripping to the top, bottom and middle of the back of the frame.

2- Add a magnet circle to the top left of the first 37 squares with the Zots. These are the only squares on the paper that will ever have dates on them - no matter what month you are in.

3- Print your numbers out and trim them. Adhere them to the clips, then stick the clips on the magnets. You can use the bottom squares that are empty for a clip to hold notes for birthdays, events, or just the name of the month if you would like.

April 4 - Butterfly Page

I printed out these photos at 4 to a 4"x6" photo sheet, so that's why you keep seeing these little photos in the projects. But I love using little photos - I love to mix it up a bit so I don't get bored using the same size photos all the time. But as of this project I'm retiring these particular photos so don't worry - you won't see them again! :) But I'm not giving up on pint-sized photos, so BEWARE!

Don't know if you can tell in the scan but the big butterfly is a large 8" clear butterfly shape from Pageframe Designs with their new swirl pattern. I just cut matching patterned paper and placed it under the butterfly. I was trying to figure out if it bothered me or not that it doesn't have a title - I almost always include a title. But I don't think it bothers me too bad so I'm going to just keep it.

Butterfly Page

Ingredients:
Instructions:

1- Adhere your butterfly down to your darker patterned paper with the vellum tape runner. Trim the paper around the butterfly shape. Adhere the butterfly with the patterned paper to your 12"x12" lighter pattern.

2- Write your journaling tabs and cut them out. Adhere them around your butterfly shape. You may need to adjust some words to make it fit correctly. I lay mine all out to make sure it fits before I start to adhere them all down.

3- Sew around the border of the page with white thread. First I sewed a single straight stitch, then changed my machine to a zig zag stitch and went around the border again over and around the straight stitches.

4- Adhere your photos, then your rhinestone circles. Draw your antennae and you're done!

Saturday, April 5, 2008

April 3 - Clear Door Hanger

The girls and I have been working on a pretty big project this week. They have a smallish storage space in their room where the roof slopes down in the front of the house and we used to just have it stuffed with stuffed animals that they don't play with anymore. Well, I thought it would be much better used as a clubhouse - so we spent a few days this week getting it all cleaned out. There is still a lot to do to it (like repaint the door that they creatively drew all over with crayons!) but I think it will look really cute when we're done.

Tara from Pageframe Designs had sent me these really cool clear door hangers with the new patterns they had come out at CHA on them so I decided to decorate one for the new clubhouse door. This is an amazingly simple project since the door hanger has a pattern already you really don't need to do a whole lot to it. But the girls love it which is what counts!

Clear Door Hanger


Ingredients:
Instructions:

1- Peel the protective coating off of the back of the door hanger.
2- Attach your images to the front and using a 3-D Zot attach your butterfly.
3- Write your title on the patterned paper and cut them out. Adhere them to the door hanger.
4- Hang it up! :)

Thursday, April 3, 2008

April 2 - Free Journaling Download!

I can't believe I've done this blog for over a month and haven't done anything digital on it - I really have to be in the mood to do it and just hadn't gotten there yet. But during the last few days the digital bug has bit. So I thought I would make something to share here. As you know from the last few posts I'm really into the fun little journaling squares lately so I decided to make some fun ones as a free download.

Just click here to download the PDF file of the image to the right. It is an 8 1/2" x 11" file, so it will print on any cardstock or patterned paper you stick in your printer to print on. Then just cut out the words you want to use!

Instructions:

1- Download the .zip file (it is about 2mb and may take a few minutes to download)

2- Unzip the file and extract the PDF file.

3- Open the PDF file and print!

Hope you like them and enjoy using them! :) If you need help using them just post a comment and I'll help you out!

Oh and one more thing - the font I used is one of my favorites called Tainted. Just in case you would want to make matching titles or whatever!

Tuesday, April 1, 2008

April 1 - Clear Birthday Card

I mentioned a few posts ago how much I love the Wordfetti stickers by Making Memories. There are a ton of words in the package, but not always the right words that I need for all of my journaling, etc. So I thought - I'll just make my own.

I don't buy a whole lot of scrapbook related books, but Love Your Handwriting by Heidi Swapp has been about the BEST scrapbooking book I have ever purchased. While it does give you excersizes for practicing your writing the best thing it did for me is just give me confidence in my writing. I used to HATE my handwriting and when I would try to write something I would be so completely scared that I would mess it up that my letters would be shaky and I would end up messing it up. But this book really did give me the confidence to like my handwriting, which ultimately helped me write better since I wasn't so worried about it when I was doing it.

It also talks about how finding the best pen for YOU helps your handwriting as well, and that cannot be more true. My favorite journaling pens are the Micron pens by Sakura and for the longest time I used a .05 tip, but recently started using a .08 tip and love how it works for me so much more. Once you find the confidence and the right pen for you, you might be surprised how much you love your handwriting!

Clear Birthday Card


Ingredients:
  • Clear Star Patterned Card (Pageframe Designs)
  • Glitter Flowers (Prima)
  • Small Zots and Tape Runner (Therm O Web)
  • Rhinestones
  • Kraft Cardstock (Stampin' Up!)
  • .08 Micron Black Pen (Sakura)
  • Bling Cardstock (Bazzill Basics)
Instructions:

1- Using your small Zots adhere 3 matching glitter flowers in the center of 3 of the middle black stars. Also using the Zots add rhinestones in the center of the flowers.
2- Write your greeting words on the kraft cardstock drawing a border around each word and cut them out. Adhere them on the front of the card around your flowers.
3- Crop your cardstock for the inside slightly smaller than the card itself and write your card message around the edges. Adhere it to the inside of the card.